
17 May 7 Steps Of Explainer Video Production
Ok, so you took the plunge and finally hired an explainer video company and are excited to get your video ready. But are you aware that before actually creating your video, the studio has a lot more work to get done?
Table of Contents
Custom explainer video production has 7 distinct stages.
1. The creative brief
The creative brief is a fancy word used by studios and it simply means the main idea that you want to put across in the video that you are getting created. In this stage you will mostly likely be given a questionnaire that asks you questions about your company, the product or service that the video is being created for.
Other studios will have a creative director interview you. So basically instead of you filling out a questionnaire, you have a person who is gathering that information from you. Typical information that they require from you is what type of audience are you targeting. Are they end users? i.e. B2C or are they other businesses that your company caters to. i.e B2B. Where do you intend to use the video? on your website? in a trade show etc.
What is your marketing goal for the video? Is it to educate your visitors? or is it a softsell kind of video enticing the visitor to try out your product.
It is very essential that you provide the studio with all this information in depth so that they can translate your idea into a video that will surpass your expectations. The next stage is writing the script.
2. The Script
Some one rightly said “A script either makes or breaks the video”. You can have awesome animation and a stellar voice over, but if the story behind the video is weak, then it a given that your video wont resonate with the viewers. On the other hand if the story you have created is enagaging and is one that your viewer identifies with, then you can get away with even with mediocre animation quality.
Scripts for explainer videos are usually written by dedicated copy writers who have years of experience and know how to push the viewers buttons.
Quite a few scripts use the problem-solution approach, where you start by introducing the problem that people face, then you amplify the problem with specific examples. Doing this makes the viewer identify with the story thats being told. The script then introduces your product or service as the solution to the problem and how its unique compared to other products in the market.
3. The Storyboard
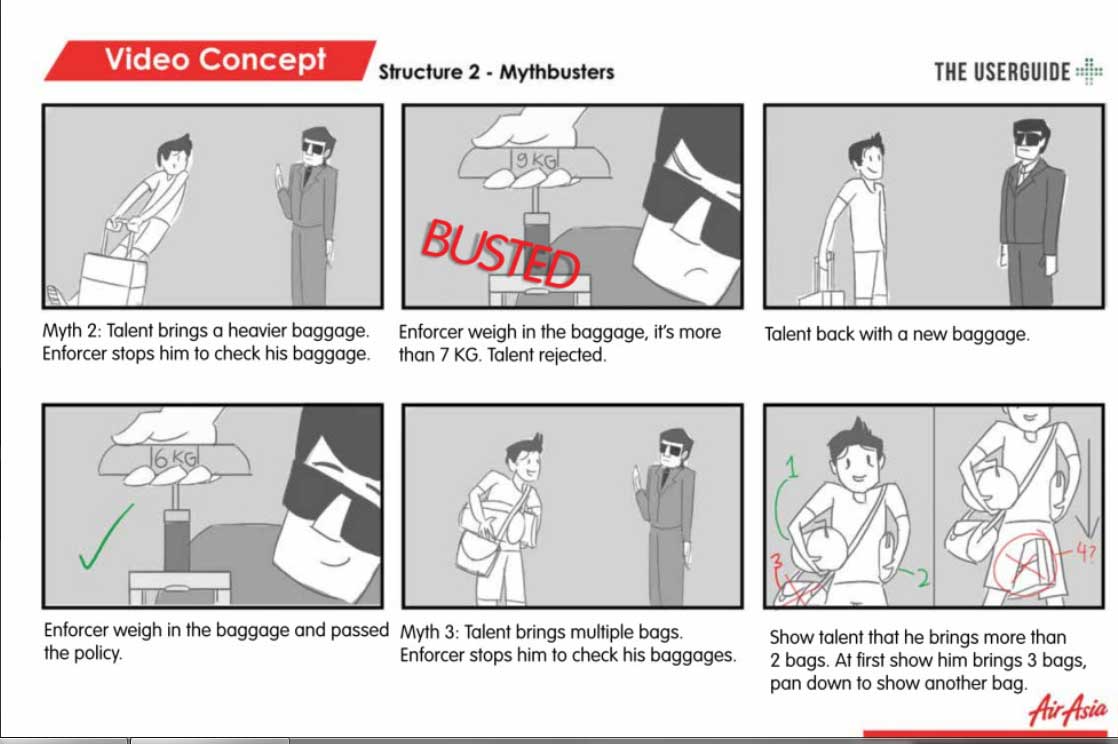
The storyboard is a visual representation of the script and shows static frames of the animation that will be created in the final video. So to put it simply its like a comic book.
The storyboard shows you all the characters, the backgrounds and the camera anglesa s well as movement. This gives you a clear idea of how the final video will end up as.
Storyboarding requires quite a bit of time and effort as illustrations take time to be created. It is due to this extra cost that budget animation studios provide you with a textual stroyboard with indicative images.
A textual storyboard is a text description of each scene. It can have some stock images added in to match the final imagery
4. The Voice Over
With a few exceptions, almost every video has a human voice narrating the script in the background as the animation progresses. Its very important that you choose a professional voice over artist as they are not only trained in the craft, but also use professional equipment and record the sound in a sound proof recording room. Its also important to make sure that the speaker is a native of the language in which he or she is recording.
So for example if you are creating a video for audiences in the UK, then using say an Australian voice talent will not have as much of an effect as using a native British voice artist speaking in RP English

5. The Illustration

Illustrations are vector images that are ultimately animated. Adobe illustrator is the tool of choice for most artists. These images drawn by the illustrator are then animated by the animator.
The illustrator is chosen based on the animation style. For example if you needed to produce a whiteboard video then the illustrator will have a cartooning background, where as if you needed character animation then the illustrator will from more of a traditional animation background
6. Animation
This is but the last step of the process. Animation is step where your video really comes to life. Animators use popular animation tools like Adobe After Effects , Toon Boom Harmony and Anime Studio Pro to animate the illustrations created in the earlier stage.
This is the most time consuming phase and most studios will not make any major revisions at this stage without charging you extra
7. Background Music and Sound Effects
This is the last step in the production process and a step which puts the cherry on top of the icing. Most explainer videos choose upbeat light music scores which usually have instruments like the ukelele, the xylophone,a ccompanied by whistling, clapping etc.
This is almost like a new genre of music as almost every studio employs the same music style.
Of course if its a corporate presentation style of video then the choice of music is more of a inspirational kind of genre.
Quite a few videos, especially motion graphic style video also employ sound what were called “Foley” sounds in the old days. The are pops and swooshes that play in the background as elements move about in the video.
These little effects also add to the charm of the video and make it more interesting.
Conclusion
After reading this article I’m sure you can appreciate the hard work that goes into the production of an explainer video. What seems like a minute of video takes 3 to 4 weeks of hard work.
I hope this will serve as a guide to you when you choose an animation studio for your project.